How to build an automatic watering device for your Christmas tree
A few years ago, I got tired of having to pour water from a tiny cup into the base of my Christmas tree stand two or three times a day.
I want to show you how you can build your own automatic tree watering device for about $25.
And the best part: it has no motorized parts or anything. Its powered by simple physics.
What you’ll need
- 10 feet of clear vinyl tubing (like this)
- Two 5/8 compression fittings (like these)
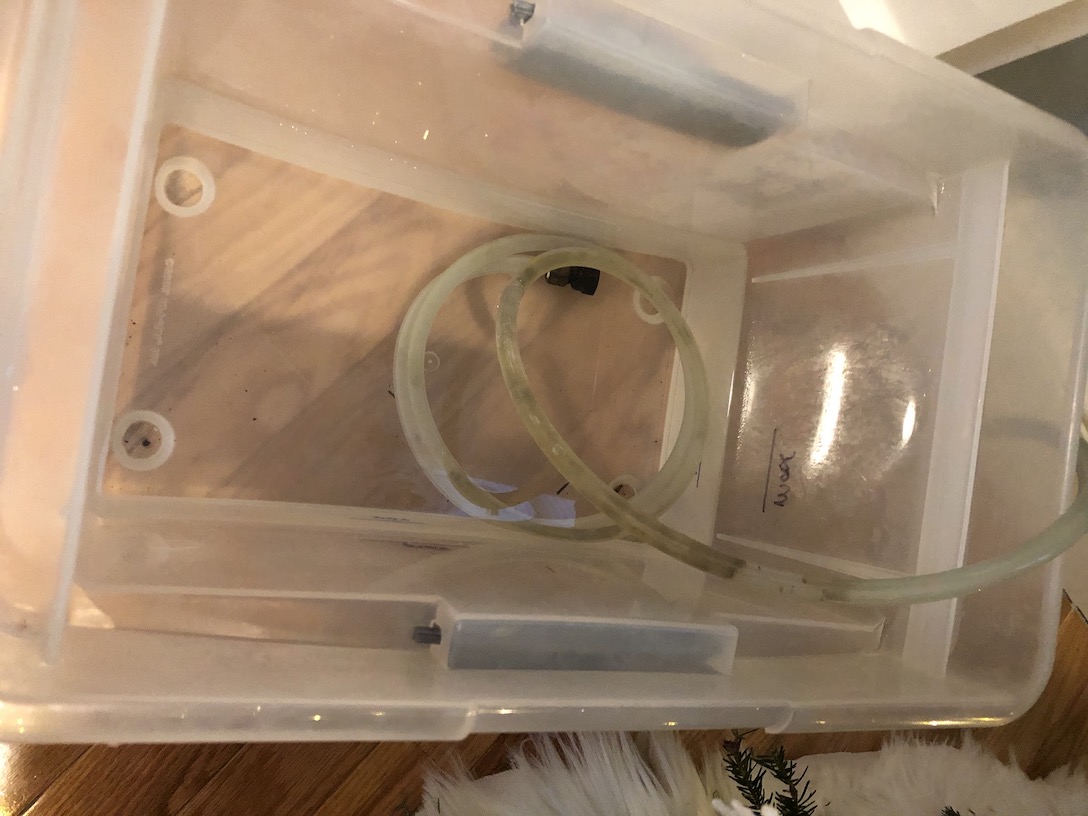
- A bucket or storage container, preferably with a lid (like this one)
- Optionally, a siphon starter pump (this one is perfect)
How to build the tree watering device
- Put a compression fitting on each end of the vinyl tubing.
- Put one end of the tube in the bucket, and the other in your tree stand.
- Fill the bucket with water. Be careful not to fill it higher than the top of your tree stand or you’ll get water all over the floor.
- Create a siphon by filling the tube completely with water.
Important: A bucket of water is a safety issue if you have children in the house. I strongly recommend one with a locking cover. You might even want to duct tape it shut for extra safety. Children can drown in just a few inches of water!
This works entirely with gravity and water pressure.
When the water level in the bucket is higher than in the tree stands, water in the tube is pulled down into the stand. Because there is a vacuum in the tube, water is pulled “uphill” out of the bucket. Here’s a video on how siphons work if you want to learn more.
Its super important that there’s no air in the tube. If there is, the siphon will break.
Refilling the bucket
How often you need to refill the bucket will vary depending on how big it is and how much water your tree drinks.
I find that the first few days I bring my tree into the house, I need to refill the bucket once in the morning and once at night. After that, I fill it once in the morning for the first week or two.
Once the tree slows down, I can fill it once every few days.
Safety
An open bucket is a drowning risk for children.
You can put a locking cover on the bucket with the tube coming out the side an maintain your siphon Put the tub as far away from the locking parts as you can to minimize how much it gets crushed by the cover and you’ll be fine.
You might want to duct tape the cover down for even more safety.
Tips and tricks
Starting the siphon
Getting the tube filled with water and completely air free, and then putting it in the tree stand while keeping air out, is kind of a pain.
I strongly recommend picking up a siphon starter pump. They’re inexpensive and make the process a lot easier.
You submerge the pump in the bucket, put the end of it into the tube, and pump three or four times until the tube is completely filled with water (make sure the other end is already in the tree stand). And that’s it. You’re done.
Prevent overfilling and underfilling
If you overfill the bucket, you’ll end up with water on the floor. If you underfill it, the base of your tree will sap over, it will stop drinking, and it will die.
On your bucket, you can mark off max fill and min fill lines with permanent marker.
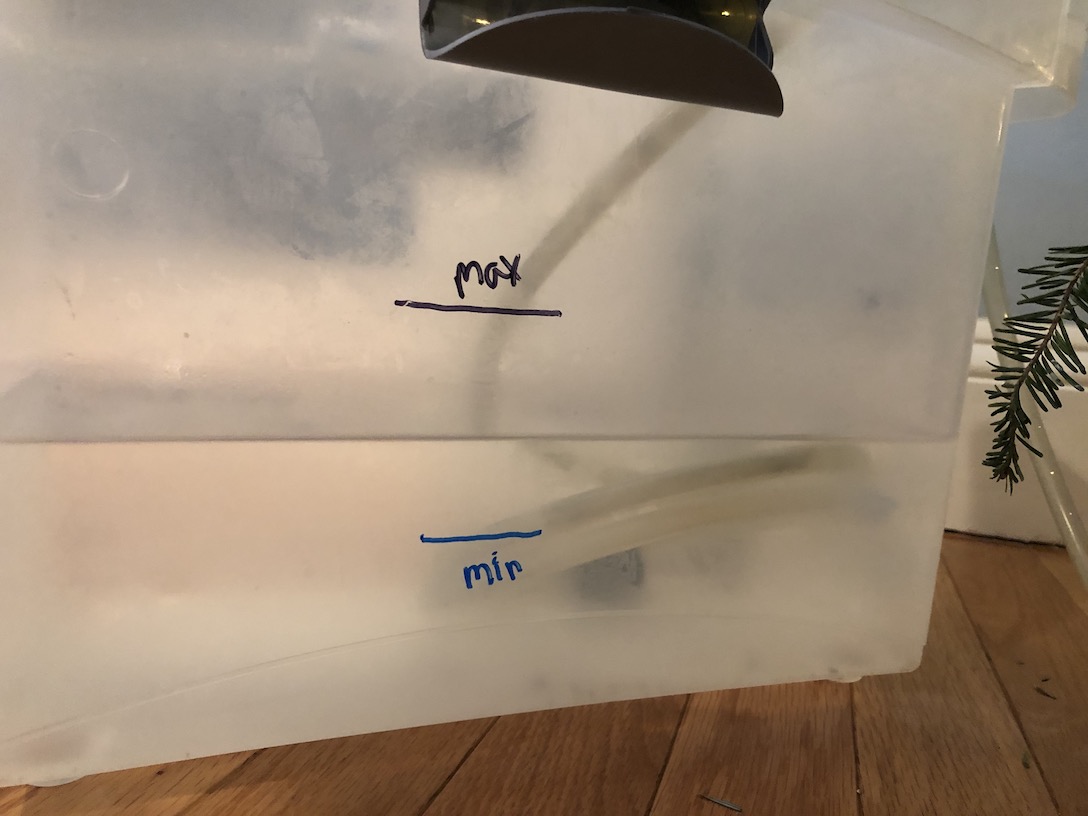
Set the max fill line to a quarter inch or so below the top of your tree stand. Set the min fill line to a half inch above the bottom of the water reservoir in the stand.
Hiding the bucket
The bucket and tube setup is pretty ugly. You can disguise the bucket as a present under the tree.

Cut the flaps off an empty box that’s about the same size as your bucket (or tape the flaps up to make a box that’s too short a bit taller). Then wrap it in wrapping paper.
You can cover the tubing with your tree skirt.